Introduction to the Rubik’s Cube
The Rubik's Cube is a classic puzzle that has captivated enthusiasts and puzzled beginners for decades. First invented by Ernő Rubik in 1974, this three-dimensional puzzle is a must-have for anyone interested in brain teasers. At first glance, the Rubik's Cube may seem intimidating with its vibrant six faces, each consisting of a different color, and a seemingly limitless array of positions. However, once you start to understand its mechanism and solve it step-by-step, it becomes a fun and rewarding challenge.
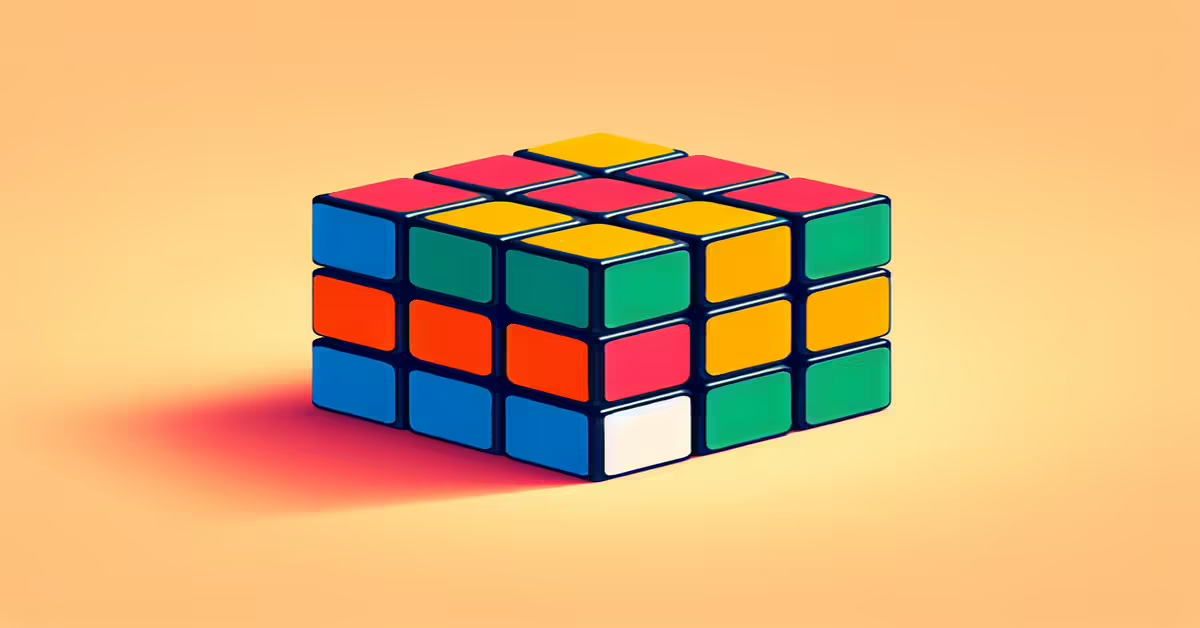
The standard 3×3 Rubik's Cube consists of six faces, known for their distinctive colors like white, yellow, red, orange, blue, and green. Each face has a centerpiece, which is fixed and indicates the color of that particular face. Surrounding these centers are smaller pieces, including edges with two colors and corners with three colors. Understanding these elements is crucial as you begin learning how to manipulate and solve the cube.
The Rubik's Cube isn’t just about turning random sides in hopes of aligning colors. It requires logic, pattern recognition, and strategy. Different methods have been developed to teach beginners how to solve it efficiently. The 'Beginner’s Method', which we will outline in this guide, is particularly popular because it breaks down the solution into manageable steps that anyone, with enough practice, can master.
Solving a Rubik's Cube doesn't just sharpen problem-solving skills; it also builds patience and the ability to think sequentially. While the cube can seem frustrating at first, persistence pays off. The satisfaction of finally seeing those vibrant colored faces perfectly aligned is well worth the effort. Whether you're learning to impress your friends or to challenge your cognitive skills, entering the world of Rubik's Cube solving opens up a whole new realm of possibilities.
Understanding the Structure of the Cube
To unravel the mystery of the Rubik's Cube, a vital first step is to grasp its fundamental structure. The standard 3×3 Rubik's Cube features six faces, each adorned with a unique color. These faces provide a foundation for the cube's challenges and solutions. Each face has its fixed center piece, which determines the color the face must eventually display once solved. The cube is constructed from 26 smaller pieces which move around a central core, allowing the cube's external sections to rotate independently.
The pieces can be categorized into three types: centers, edges, and corners. Centers, aligned with the cube's core, are single colored and static; they define the colors of their respective faces. Edges bridge two center pieces and flaunt two colored stickers. These 12 edges are key to forming the cross patterns vital to solving methods. Finally, the corners fit three stickers each, representing the junction of three different colored faces.
The official color scheme typically consists of white opposite to yellow, green opposite to blue, and orange opposite to red. This can, however, vary slightly across different cubes. Understanding this setup is crucial, as solving the cube revolves around placing each edge and corner in coherence with these fixed centers.
Once familiar with these basic structural components and how they relate and move, solving the Rubik's Cube becomes systematically approachable. Identifying how centers guide you, how edges form essential cross patterns, and how corners complete the picture will make you ready to delve into the intricacies of cube solving techniques.
Choosing the Right Cube and Colors
Choosing the right cube is an essential step for beginners who want to learn how to solve a Rubik's Cube effectively. As a beginner, opting for the right 3×3 cube will make the learning process smoother. One of the popular models for beginners is the Shengshou Aurora, known for its smooth turning and affordability. Choosing a cube with good corner cutting is crucial as it prevents unnecessary locking during turns, making your practice sessions more seamless.
When it comes to cube colors, understanding the standard color coding of the traditional Rubik's Cube is beneficial. Typically, the white face is opposite the yellow, the orange is opposite the red, and the green is opposite the blue. However, some cubes might offer different color schemes, which can slightly alter your solving approach but usually follow a basic complementary pattern.
While the traditional cube with stickers may offer a classic feel, you might also consider a stickerless model. These have the colors molded into the plastic, providing a more durable solution as there are no stickers to peel off or wear out. As a beginner, focusing on a cube that suits your preference in feel and color scheme will help you maintain consistency in solving methods. In practice, ensure that your cube is adequately lubricated and tensioned for optimum performance. This attention to detail can significantly influence your overall solving experience, allowing you to focus more on techniques and less on mechanical hindrances.
Getting Familiar with Basic Movements
When learning to solve a Rubik's Cube, understanding its basic movements is key to mastering the beginner's method. The Rubik's Cube consists of several moves that work together to navigate the various pieces into place. These movements are often referred to as turns, and each turn involves rotating one of the six faces of the cube either a quarter turn (90 degrees), a half turn (180 degrees), or even three-quarters (270 degrees) in a clockwise or counterclockwise direction.
To familiarize yourself with these movements, start by holding the cube with one face directly in front of you. This front face can be labeled as F for convenience. The remaining faces are identified as follows: the top face is U for Up, the back face is B, the bottom face is D for Down, the left face is L, and the right face is R. These notations help in understanding and memorizing the sequences of movements needed to solve the cube.
Begin by practicing how each face rotates. A common way to notate a clockwise turn of a face is simply by using the letter of the face itself, for example, F for a front face turn. If you need to turn a face counterclockwise, some tutorials might use an apostrophe or a lowercase i, such as F' or Fi. Understanding these notations allows you to follow algorithms — predetermined sequences of moves — which are essential in solving the cube systematically.
It is critical to get comfortable with these movements and the concept of a static center. The center squares on each face never change their relative position. They help in maintaining orientation and understanding the cube's current state. By practicing these basic movements, you establish a foundation on which you can build more advanced skills like solving the cube's layers and optimizing move sequences.
Initially, aim for slow and deliberate practice of these movements to ensure accuracy and understanding. Over time, your hands will become more accustomed to the sequences, allowing you to execute them more fluidly. Proficiency in these rudimentary movements makes the overall solving process much smoother and more manageable as you progress through each stage of solving the cube.
Starting with the Cross
The journey to solve a Rubik's Cube begins with creating a solid foundation, starting with the cross. This is your first goal: to form a white cross on the top face of the cube. This step serves as the first anchor point in your solving method and is crucial as it provides the reference points for the rest of the puzzle. Begin by examining the cube and determining where the white edge pieces, those with one white square, are located. These edge pieces need to be aligned so that the white square can create a continuous line or cross with the center piece of the same color on the top face. To do this, positioning is key. Make sure the center piece on the top is white, and start adjusting the white edge pieces until they are all surrounding the white center, forming a cross. It might require moving some pieces around on the side faces to bring a white edge into position before rotating it to the top. Always remember to do it in a way that aligns the other color of the edge piece with the center color of the adjacent face. This method ensures that not only does your cross appear perfectly on the top but also aligns geometrically correct with its adjacent centers. This is a part of what is generally called intuitive solving, where pattern recognition and small adjustments as needed replace the need for algorithmic complexities. Ensuring each white edge piece is correctly oriented with its corresponding center makes you ready to smoothly proceed to solving the next layers of the cube. As you practice forming the cross more and more, you'll notice how muscle memory develops, allowing you to anticipate and swiftly make the necessary moves, transforming it from a mental challenge to almost a second nature action. With the white cross in place, the path is clear to advance to the corners, building upon the stable groundwork laid with your successful cross.
Positioning the White Corners
Once you have successfully completed the cross on the top face of your Rubik's Cube, it's time to move onto the next crucial stage: positioning the white corners correctly. The goal here is to place the white corner pieces into their respective positions on the top layer, ensuring that the entire face is completed with the white color. This step requires some attention to detail, as each white corner piece must align with the corresponding side centers.
Start by identifying where each white corner piece currently resides. Search the entire cube, particularly focusing on those sitting in the bottom layer, since these pieces are typically not yet in the correct position. Choose a white corner and rotate the cube so this piece is located on the bottom right of the face you've made the cross on and directly under where you want it to eventually land.
The key to this step is using what's known as the “right-hand algorithm,” which will allow you to maneuver these corners into place without disturbing the cross you've already established. Here’s a simple way to remember the moves: right hand down, bottom layer to the left, right hand up, and then bottom layer to the right. Repeat these moves until your white corner lands where it should, with the white color facing upwards.
Don't worry if the corner isn't correctly oriented right away. You might need to repeat the algorithm a few times to get it into its proper alignment. The aim is to have all white corner pieces in their correct spots on top. It's important to ensure that the other two colors on each corner piece line up with the respective side centers too, maintaining consistency across the entire face.
As you go through these motions, keep practicing using the right-hand algorithm, as mastering it will help you complete this step more smoothly in future attempts. Remember that practice is essential to improve your speed and efficiency, leading toward mastering this puzzle. With patience and repetition, you’ll find that placing these corner pieces becomes an intuitive process.
Solving the Middle Layer
After successfully placing the white corners, the next phase involves tackling the middle layer of the Rubik's Cube. This step will focus on positioning the edge pieces correctly between the corners that are already in place. For solving the middle layer, look for edge pieces in the top layer that do not contain the yellow color, as these will be crucial for completing the middle layer. Select an edge piece and align its side color with the corresponding center color, forming a T-shape. When aligned correctly, observe whether the edge piece needs to move to the left or right. To insert the edge piece from the top layer into the middle, you will need specific algorithms. For a piece that needs to be positioned to the left, start with the upper face move away from the desired position, rotate the left face upwards to insert the edge, rotate the opposite face to match, and then rotate downwards. For a piece needing movement to the right, mirror the algorithm to ensure smooth placement. Complete this process for all necessary edges in the middle layer, taking care not to disrupt the already solved white layer. Practice this repeatedly to build an intuitive sense for when and how each movement achieves the desired effect, thus concluding this layer with precision.
Forming the Yellow Cross
Once you have successfully solved the middle layer of the Rubik's Cube, it is time to concentrate on forming the yellow cross on the top face. This step is crucial as it sets the stage for solving the final layer effectively. You might find that the yellow face currently has different formations, such as a dot with no edge pieces having the yellow sticker facing upwards, an L-shape formed by two edge pieces, or a straight line made by opposite edge pieces showing yellow.
To achieve the cross, you need to execute a specific algorithm that helps rotate pieces into the correct position without disturbing the lower layers. Hold the cube so that the yellow face is on top and start with a simple move. If you are starting with a dot, apply the right algorithm once to progress to the L-shape formation, ensure the L-shape is positioned in the top left, then reapply the algorithm to form the line. Once the line is visible, ensuring it runs horizontally on the cube as you face it, another application of the algorithm will transform it into a cross.
Remember, the surrounding center pieces help guide the yellow edge pieces each time you perform this maneuver. This phase relies heavily on remembering the specific sequence of moves since different initial patterns dictate the number of algorithm applications required to reach the yellow cross stage.
This step can be perplexing for beginners, but practicing the algorithm sequence repeatedly will solidify your understanding, and you'll soon grow accustomed to recognizing the pattern changes and executing the moves instinctively. Preparing the yellow cross is a foundation upon which subsequent adjustments to piece positioning and orientation will rest, so achieving a solid grasp of forming it marks a significant milestone in mastering the Rubik's Cube.
Positioning Yellow Edges
After solving the middle layer, the next step is aligning the yellow edges to form a neater pattern before tackling the tricky corners. To start positioning the yellow edges, you first need to focus on forming a yellow cross on the top face of the cube. This step is quite crucial because without the yellow cross being properly in place, the following steps will not connect seamlessly. Positioning the yellow edges involves a bit of observation and the application of basic algorithms to ensure the edges are correctly aligned with their corresponding center colors.
Initially, you may find your yellow edges scattered across different locations. The aim here is to bring them together to form a cross regardless of their orientation. Look at the top face to determine the current state of the yellow pieces. You might find that you have a single yellow center, or maybe some of the edges already partially form a cross either as a straight line or as a small L shape.
To align the edges properly, use the algorithm: Front, Right, Up, Right Inverse, Up Inverse, and Front Inverse. This algorithm will rotate the yellow pieces without disrupting the other layers you've painstakingly solved.
Don’t be discouraged if it takes more than one try; practice will make the process smoother. With each application, observe how the pieces shift and adjust your approach until the cross is firmly in place with every yellow edge aligning with its respective center piece color. Once this is achieved, you're ready to move on to the more intricate task of correcting the corners. Keep focusing and remember that each small victory on the cube edge is a step closer to solving the entire puzzle. This part of solving the Rubik’s Cube can be less instinctual and more about repetitive practice, so patience and persistence are key.
Correcting Yellow Corners
Now that the yellow edges are in place, the next task involves addressing the yellow corners on the top layer. This is essential for completing the cube. At this stage, focus on placing the yellow corners in their correct positions even if they are incorrectly oriented. This means that each yellow corner should be sitting above its correct position, using the colors of the adjacent center pieces to guide placement. To do this, rotate the top face of the cube and inspect each corner to see if two colors other than yellow match the center pieces of two adjacent sides. Once identified, use a simple sequence of moves that involve rotating the face with the incorrectly placed corner until the piece is brought down to the side and then lifted back into place. This might need to be repeated several times until all corners are correctly positioned. Remember, the goal here is not to rotate the yellow corners into their final orientation, but rather to position them above the correct squares. Aligning the corners in the right position will naturally lead to a resolution as further steps are implemented. If none of the corners are already correctly positioned, apply the algorithm moving one corner piece in place at a time. The process might seem repetitive, but a calm and methodical approach will ensure the yellow corners are in the right position, paving the way for the final orientation steps.
Final Adjustments: Orienting the Yellow Corners
As you approach the final phase of solving the Rubik's Cube, the focus is on correctly orienting the yellow corners. This step can seem a bit daunting initially, but with practice, it becomes straightforward. The main goal here is to ensure that each yellow corner is not only in the correct position, which you should have achieved in the previous step, but also correctly oriented. Begin by locating a corner that is not yet oriented correctly. You will need to perform a specific sequence of moves to adjust the orientation of the corners. Make sure the incorrectly oriented corner is at the front-right position before starting the sequence. This sequence involves rotating the right face downward, moving the bottom face to the left, and then rotating the right face upward, followed by repositioning the bottom face. Repeat this sequence until the corner is oriented correctly. It's crucial to note that following these moves might disrupt the cube's integrity by temporarily jumbling the layers lower down, but there is no need to panic. Continue adjusting each corner in a similar fashion, always beginning with the unaligned corner in that front-right position. Remember, if one of the corners is already oriented correctly, you can skip that corner and proceed to the next one. Persistence and practice are key here, and by the end of this process, you should see your cube fully solved. The excitement of manipulating all these mechanisms to bring everything into place is incredibly rewarding and shows the beauty of solving the Rubik's Cube using a structured approach.
Practice Tips and Conclusion
After learning each step to solve the Rubik's Cube, practice is your best friend. Consistent practice will not only improve your solving speed but also help make the movements second nature. Start by focusing on mastering one stage at a time. Break the process down into manageable chunks, firstly ensuring you are comfortable with the cross and the first two layers before moving on. Familiarize yourself with holding the cube correctly and rotating it smoothly without unnecessary twisting. Try different lighting and hand positions to see what feels most comfortable. Remember that improving your cube-solving skills takes patience and persistence, so be patient if it feels complex in the beginning. Speed comes over time, along with muscle memory you develop with frequent practice. It is beneficial to time your solves to measure progress and set new goals. Watching tutorials online and engaging with fellow enthusiasts can also provide new insights and encouragement. Stay motivated by joining online forums or watching videos of seasoned solvers to see the possibilities that await you. Above all, enjoy the process and celebrate small successes as you advance from a beginner to a more experienced cuber. By regularly practicing each step you learned, you will soon be able to solve the Rubiks Cube with ease and confidence. Keep challenging yourself with different methods or advancing to puzzles of greater complexity to keep the experience fresh and exciting.